Background
It's been a long time since I wrote the first line of OpenGL code. However, I've never read the implementation or debugging in driver.
Mesa3D is a hodgepodge of Open Source driver implementation, and is widely used on Linux Desktop. It's a good place to start.
For Linux Users
I miss my old golden days of working on Linux Desktops. It's trivial to compile it on Linux, just follow the official tutorials and it should be OK.
For WSL1 Users
Don't waste time on it. It's not worth it.
The Mesa3D compiles on WSL1. I managed to run glxgears on it, and that's all.
Its X11 environment is tricky, and GLFW/SDL may refuse to work.
I ran into the same problem in the following article on OpenGL programs with GLFW on WSL1 using vcxsrv and wasted some time on it, and then gave up.
Ref:OpenGL Development on WSL: From Setting Up to Giving Up (And What I Learned) - I'm Bowen
PreBuilt Binaries on Win32
There is a shortcut for just using, debugging and reading Mesa3D on Windows.
Some good guys provide prebuilt binaries for Mesa3D on Windows, with debugging symbols and MinGW64/MSVC variants.
Whatsmore, it provides hand-to-hand tutorials and some useful scripts on how to deploy it.
Also, its README is a good reference about the components of Mesa3D.
As I said before, Mesa3D consists of many drivers and components, and only some of them are useful, depending on the use cases.
The problem with this solution is that it's not easy to tweak and tune the code, and then see what happens. With debugging symbols we can step into the code, but cannot modify it and do some experiments.
Some detail steps about this solution:
- Download prebuilt binaries with debugging symbols and its corresponding source tarbar from archive.mesa3d.org
- Place the dlls/pdbs into the same dir of the executable needs. I personally use codebase from
LearnOpenGLas a starting point.
Visual Studio
If Visual Studio is used, one way to debug is to run executable with Bat script(makesure opengl32.dll and PDBs are in same dir with the executable)
@set MESA_GL_VERSION_OVERRIDE=4.5
@set LIBGL_DEBUG=verbose
@set GALLIUM_DRIVER=llvmpipe
@TestProject.exe
With VS to attach to the process, and set breakpoints, then step into OpenGL calls. Visual Studio may pop a window asking for the location of the source code, select the source code dir we downloaded/extracted earlier. And it should be able to step into the code.
Visual Studio Code
Another way is to use launch.json in Visual Studio Code for debugging.
It's more convenient when programmers are developing applications using VSCode.
The key configuration is SourceFileMap to provide the actual source code in OUR disks.
{
    // Use IntelliSense to learn about possible attributes.
    // Hover to view descriptions of existing attributes.
    // For more information, visit: https://go.microsoft.com/fwlink/?linkid=830387
    "version": "0.2.0",
    "configurations": [
        {
            "name": "(Windows) Launch",
            "type": "cppvsdbg",
            "request": "launch",
            "program": "<Path-To-Debug-Executable>",
            "args": [""],
            "stopAtEntry": false,
            "cwd": "${fileDirname}",
            "environment": [
                {"name": "LIBGL_DEBUG","value":"verbose"},
                {"name": "GALLIUM_DRIVER","value":"llvmpipe"},
                {"name": "MESA_GL_VERSION_OVERRIDE","value":"4.5"},
            ],
            "console": "externalTerminal",
            "symbolSearchPath": "<Path-To-PDBs, e.g.: D\\mesa\\mesa3d-23.0.0-debug-info-msvc\\x64>",
            "sourceFileMap": {
                "C:\\Software\\mesa": "D:\\mesa\\mesa-23.0.0"
            }
        }

    ]
}
Build On MinGW64
It's a little bit annoying to build Mesa3D on Windows, because it depends on LLVM, a big monster.
I decide to use MinGW64 environment provided by MSYS2.
It provides many prebuilt binaries and a perfect Pacman package manager.
The environments are now permutations of Toolchain(gcc/clang), Architecture(x86_64/i686/arm64) and C Runtime(MSVCRT/UCRT).
I use MinGW64-x86_64-ucrt64 variant as the environment.
There are some Introduction about the permutations(Environments - MSYS2), but it is still a mess.
In fact, I'm also confused about UCRT/MSVCRT.
All my knowledge is ucrt is newer and better(told by Microsoft), and only God and M$ guys know if it's true.
Install Dependencies
pacman -S --noconfirm mingw-w64-ucrt-x86_64-toolchain
pacman -S --noconfirm mingw-w64-ucrt-x86_64-python
pacman -S --noconfirm mingw-w64-ucrt-x86_64-python-pip
pacman -S --noconfirm mingw-w64-ucrt-x86_64-ninja
pacman -S --noconfirm mingw-w64-ucrt-x86_64-cmake
pacman -S --noconfirm flex bison
pacman -S --noconfirm mingw-w64-ucrt-x86_64-clang
pacman -S --noconfirm mingw-w64-ucrt-x86_64-directx-headers
pacman -S --noconfirm mingw-w64-ucrt-x86_64-glslang
pacman -S --noconfirm mingw-w64-ucrt-x86_64-dlfcn
pacman -S --noconfirm mingw-w64-ucrt-x86_64-freeglut
pacman -S --noconfirm mingw-w64-ucrt-x86_64-make mingw-w64-ucrt-x86_64-glfw
pacman -S --noconfirm mingw-w64-ucrt-x86_64-vulkan-devel
python -m pip install meson mako
-
Download Mesa code from (https://archive.mesa3d.org/), and extract it.
-
run follow commands, there are many options available, see
meson_options.txtfor details. For mesoftware rasterizerare enough.
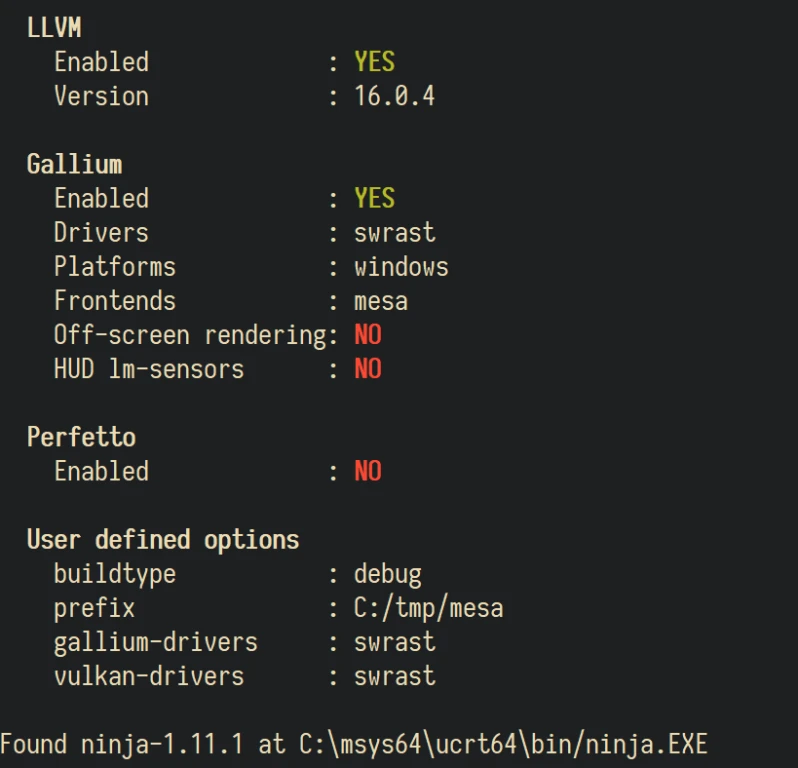
meson setup build/ -Dprefix=/c/tmp/mesa --buildtype=debug -Dgallium-drivers=swrast -Dvulkan-drivers=swrast
meson install -C build/

- (Optional) For testing, why not use our favorite
glxgears
// downlaod windows-ported glxgears
wget https://raw.githubusercontent.com/MrWilq/windows-glxgears/master/glxgears/main.cpp
// using MinGW64 to build it
g++ main.cpp -O glxgears -lopengl32 -lgdi32
copy built dlls to the glxgears dir and using MinGW64 shell to run.

- (Optional) If we want to run executable without MinGW64 shell, we need to copy some dlls from
C:\msys64\ucrt64\binto the dll. These dlls are depencies, and their dir is appended inPATHwhen MinGW64 shell is present. copy following dlls fromC:\msys64\ucrt64\bintoC:\tmp\mesa\bin, this is a workaround for MinGW64 environment.
libiconv-2.dll
libintl-8.dll
libsystre-0.dll
libtre-5.dll
libwinpthread-1.dll
libzstd.dll
zlib1.dll
